Home » Documentations and support » Proxmox Mail Gateway (PMG): how to protect yourself against spam

Proxmox Mail Gateway (PMG): how to protect yourself against spam

Proxmox Mail Gateway is an open-source email security solution based on Debian GNU/Linux, designed to protect against spam, viruses, Trojans, and phishing.

We will see how to use this interface to manage spam reports from the software.

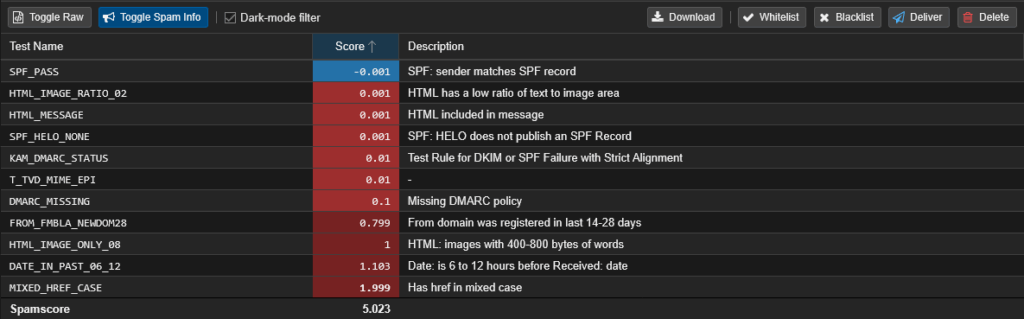
If an email is considered SPAM with a score higher than 6 (see scale below), it will be quarantined.

A daily report of quarantined messages is then sent to you.

The Proxmox spam report in your mailbox

When you open the email from Proxmox, the list of emails marked as potential spam is displayed.

Tutoriel PMG spams : etape 1
Bulle Etape 1

On click onemail subject line :
redirect to the Proxmox spam manager interface.

Bulle Etape 2

Whitelist : reorder the email as a standard email,
we tell it that it is not spam.

Bulle Etape 3

Blacklist : allows you to mark this email as spam.

Bulle Etape 4

Deliver : allows the email to be treated normally as a standard email.

Bulle Etape 5

Delete : delete the email directly.

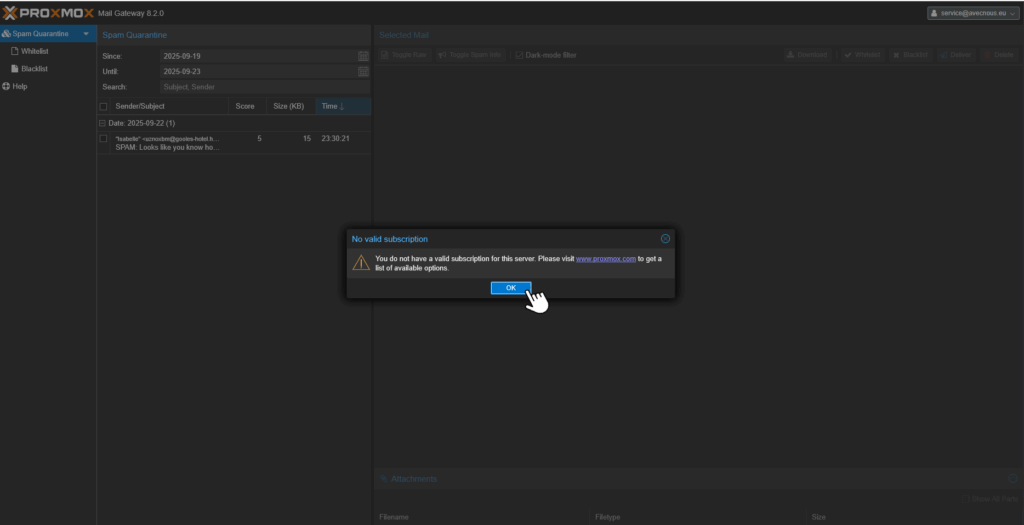
Once you have arrived at the Proxmox interface: confirm the entry.

Click OK in the dialog box. It will say “you have no active subscription” because it is a free version.

Tutoriel PMG spams : etape 2

Click on the email in question to analyze the content.
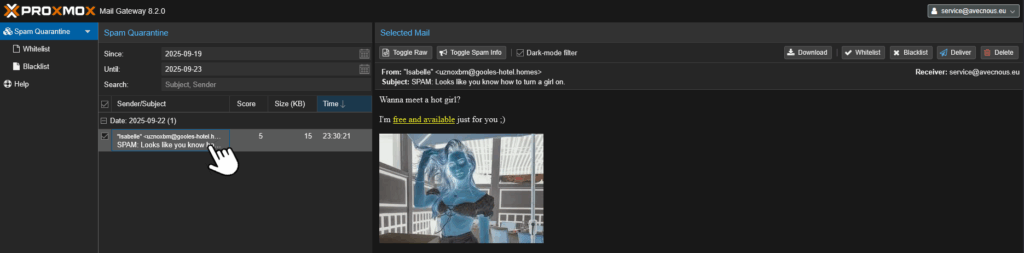
Tutoriel PMG spams : etape 3

Menus options:

Tutoriel PMG spams : etape 4
Bulle Etape 1

Toggle raw : displays the source code of the email.

Tutoriel PMG spams : etape 4 A
Bulle Etape 2

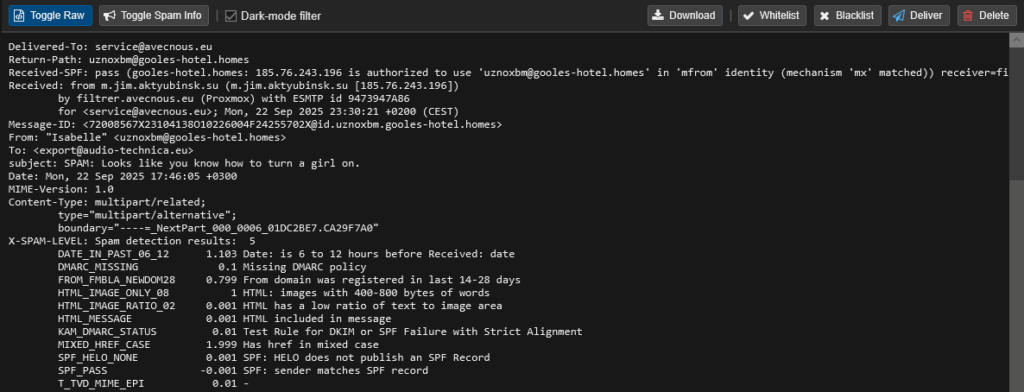
Toggle spam info : displays information and scores for potentially risky content in the email.

Tutoriel PMG spams : etape 4 B
Bulle Etape 3

Darkmode filter : displays the interface in light or dark mode.

Bulle Etape 4

Download : download the mail.

Bulle Etape 5

Whitelist : allows you to mark the email as not risky.

Bulle Etape 6

Blacklist : allows you to mark the email as spam.

Bulle Etape 7

Deliver : the email is sent back to be processed normally
(it then goes back to the inbox).

Bulle Etape 8

Delete : allows you to delete the email directly.

Quarantined emails: left menu

2 submenus: whitelisted emails and blacklisted emails.
In each submenu, you can process email lists.

Tutoriel PMG spams : etape 5
Tutoriel PMG spams : etape 6

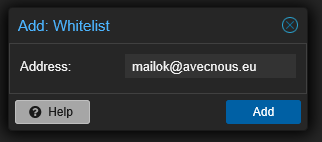
“Add” option: manually add an email address to the whitelist or blacklist

Click on “Add,” a dialog box will open: enter the email address in question and confirm the action by clicking on “Add” (blue button) for the email to be taken into account.

Tutoriel PMG spams : etape 5 et 6 ADD

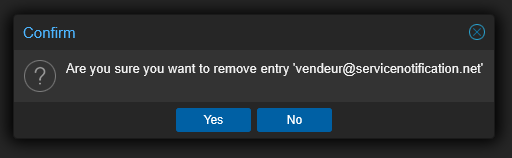
“Remove” option: manually remove an email from the whitelist or blacklist

Select the box for the email in question, then click on “Remove.” A dialog box will appear asking you to confirm whether or not you want to delete it.

Tutoriel PMG spams : etape 5 et 6 REMOVE

FAQ: Your questions, our answers

Configuration

How is the overlap between Polaris categories and WooCommerce categories achieved?

Up to you!

The configuration of the WooCommerce Polaris extension allows you to determine the correspondence between Polaris and WooCommerce taxonomies.

For each Polaris taxonomy (categories, classification; season, collection, level) can be associated with a WooCommerce taxonomy (category, label, attributes...). Custom taxonomies, brought by other extensions are also supported.

For each taxonomy, you will choose:

  • if a different product must be created for each element (for example by color)
  • To which WooCommerce taxonomy should it be associated
  • If you select an attribute, you can also choose whether this attribute will be used as a variation and whether it should be visible publicly.

If none of this is selected, the taxonomy will simply be ignored.

Comment savoir un si un produit non importé est un bug ou un problème de réglage ?

Context

Vous vous attendez à voir certains produits dans la boutique en ligne, mais ils ne sont pas importés.

Cela peut-être dû à un plantage lors du processus d’importation ou simplement d’un mauvais réglage. Il convient en premier lieu de déterminer la cause de l’absence du produit pour pouvoir le corriger.

Solution

Pour savoir si un produit absent est lié à un bug ou un réglage, vous devez en premier identifier la cause.

Pour cela, vous devez identifier précisément un produit présent dans votre caisse et absent de la boutique.

Vous aurez besoin de son numéro ou du numéro de modèle.

1. Importer manuellement tous les produits

Lors du processus d’importation, le connecteur appelle la caisse Polaris pour récupérer tous les produits avec ces critères :

  • correspondant aux filtres
  • modifiées depuis le dernier import

pour vérifier les critères de filtre, il faut vérifier l’ensemble des produit.

Pour cela, lancez un import partiel manuel, avec la date vide , la case taxonomies décochée.

Vous serez alors redirigé vers la vue détaillée de l’import.

2. Extraire le fichier brut des produits

Lors de la première étape, les produits sont récupérés successivement et stockés dans un fichier au format json.
Ce fichier est accessible depuis la vue détaillée d’un import, il s’agit du fichier Produits Polaris brut.

Cliquez dessus pour télécharger et ouvrir le fichier.

De base, le fichier est un texte pas très lisible par les humains (mais très compréhensible pour les machines).

Heureusement, certains navigateurs permettent de mieux lire ce format de fichier

Le navigateur Firefox affiche le fichier dans un format mis en forme et très pratique puisque l’on peut déplier/replier les éléments imbriqués

Le navigateur Chrome propose une option « Impression élégante » qui rend le texte plus lisible.

3. Chercher le produit par son numéro

Une fois le fichier affichez, utilisez la fonction de recherche dans la page (raccourcis commande + F) ou en passant par le menu du navigateur.

Saisissez le numéro du produit que vous recherchez et validez

Plusieurs résultats peuvent correspondre, surtout si vous utilisez le numéro de modèle.

Analyse

Si le produit est présent dans le fichier, comme dans l’exemple ci-contre, le problème vient sans doute d’un plantage lors de l’import.
Dans ce cas, vous pouvez affiner les réglages d’import.

Si le produit est absent du fichier, il s’agit d’un problème lié aux filtres.
Dans ce cas, il convient de vérifier les filtres d’importation.

Usage

How do I hide products without images?

Si rien de tout cela n’est sélectionné, la taxonomie sera simplement ignorée.

Explications

The hook of action polaris_update_product uses the product identifier WooCommerce $product_id and the Polaris data $polaris_data.

We therefore use the function add_action() with the default priority (10) and 2 as the number of expected parameters.

add_action( 'polaris_update_product', 'NOM_DE_LA_FONCTION', 10, 2 );

In this example, we check that the Polaris data does not contain an attribute medias or that it is empty and that the current product is not in draft:

if ( ( ! isset( $polaris_data['medias'] ) || ! count( $polaris_data['medias'] ) ) && get_post_status( $product_id ) !== 'draft' ) {
     // Faire quelquechose
}

Here, we want to make it a draft

$product = wc_get_product( $product_id ); // Récupération du produit WooCommerce
$product->set_status( 'draft' ); // Affectation de l'état
$product->save(); // Enregistrement

A similar process can be used to (re)publish products that have an image.

You can use the following code in the file functions.php of your theme or in your custom extension.

add_action( 'polaris_update_product', function ( $product_id, $polaris_data ) {
	if ( ( ! isset( $polaris_data['medias'] ) || ! count( $polaris_data['medias'] ) ) && get_post_status( $product_id ) !== 'draft' ) {
		$product = wc_get_product( $product_id );
		$product->set_status( 'draft' );
		$product->save();
	}
  if ( isset( $polaris_data['medias'] ) && count( $polaris_data['medias'] ) && get_post_status( $product_id ) !== 'publish' ) {
		$product = wc_get_product( $product_id );
		$product->set_status( 'publish' );
		$product->save();
	}
}, 10, 2 );

Comment modifier l'identifiant des catégories ?

Practical case: Your Polaris caisse has these categories:

  • Woman
    • Lingerie
      • Bra
      • Panty
      • Slip
    • T-shirt
  • Man
    • Lingerie
      • Underwear
      • Slip
    • T-shirt

Layered, you will have 2 categories named Lingerie, 2 T-shirts and 2 Briefs. You may want to differentiate them, besides the hierarchy.

The filter hook polaris_taxonomy_parameters allows to override the attributes when creating taxonomies in WooCommerce.

In the following example, we will add the taxonomy code to the identifier (slug)

add_filter( 'polaris_taxonomy_parameters', function ( $params, $taxonomy, $polaris_term ) {
	if ( $taxonomy == 'product_cat' ) {
		$params['slug'] = $polaris_term->Code . '-' . $polaris_term->Nom;
	}
	return $params;
}, 10, 3 );

Its URL will then become something like: https://votreboutique.shop/categorie-produit/007-lingerie/

How can I use Polaris product descriptions to optimize my SEO?

Depending on the configuration of the gateway on Polaris, the data may vary:

If these options are enabled then it is the internet label that is returned (if filled in) otherwise it is the model label.

If these options are not activated, then the model label is returned.

Is the WooCommerce store considered a new store and/or a seller in one of the stores?

The WooCommerce Polaris connector links your WooCommerce store to a Polaris store.

During the configuration of the extension, you choose which store your e-commerce site is associated with; it is this store that will be used as a reference for synchronizing the stock and products.

Furthermore, you will also be required to enter the register and vendor identifiers that will be used to create the sales made from the shop.

La synchronisation automatique du connecteur Polaris échoue ou n'aboutit pas

I use the Polaris connector for Woocommerce and I want to automatically synchronize the products, however, some products are not imported.

Several scenarios can explain the absence of products in the automatic import.

To ensure the cause, it is best to refer to the import logs.

Solution 1: check the filters

If the import went well and some products are not imported, it is probably necessary to update the import filters.

Solution 2: Adjust sync settings

The number of products to be processed during the call to the Polaris API and during the import process needs to be refined according to your server’s resources.

If the imports do not succeed, reducing the values will significantly increase your chances of success. The import will be just a little longer.

Are sales made on the WooCommerce store correctly sent to Polaris with daily sales figures per item?

Sales made on the WooCommerce store are sent to Polaris in real time with the reference of each Polaris item.
A synchronization note is then added to the WooCommerce order with the sales number.

Thus, you can easily find the sale at the checkout

My Polaris connector automatic synchronization is not working

J’utilise le connecteur Polaris pour WooCommerce et je souhaite exporter ou synchroniser de façon automatique les données des ventes de votre boutique en ligne sur votre logiciel de caisse.

It may be that the automatic synchronization of your sales is not taken into account and therefore, all data related to transactions on your online store does not appear on your cash register software.

Solutions:

To remedy this situation, simply keep your POS software running. All sales generated during your inactivity will be taken into account during the automatic synchronization at any time. Warning, the switched off cash register will prevent the synchro automation of the stock.