Installing the extension
In order to start using the plugin, installation is required:
- Locate the installation file for your WordPress site. Place the file containing the extension woocommerce-polaris-connector in the directory
wp-content/plugins. - Once the file has been placed, go to the administration page of your WordPress website, then to the extensions submenu.
- Enable the extension named WooCommerce Polaris Connector
- To enable translations, follow the tutorial Get our premium extensions in French.

Settings
- Go to the submenu settings of Woocommerce
- On the settings page, go to the Polaris submenu.

Setting up credentials
In order for the plugin to query the Polaris API database, we need to provide it with the necessary credentials. There are five fields to fill in:
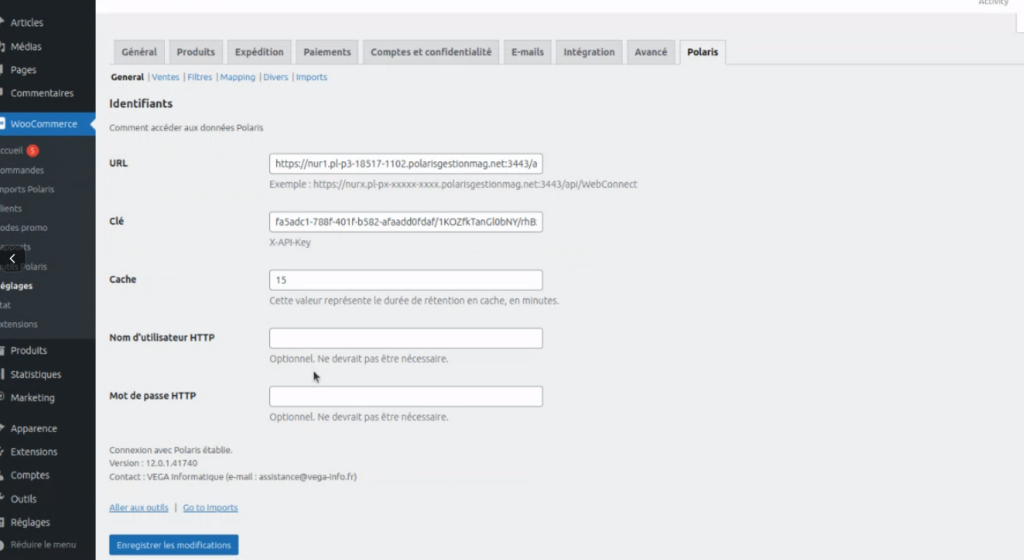
- URL : This field must be filled in with the link used for Polaris.
- Key : Enter the confidential code provided by Polaris.
- Cache Enter the duration (in minutes) for which query results are retained in the API. During installation, the value 15 is automatically entered. For testing purposes, we recommend using a cache value of 0 to disable it.
- HTTP username : Optional
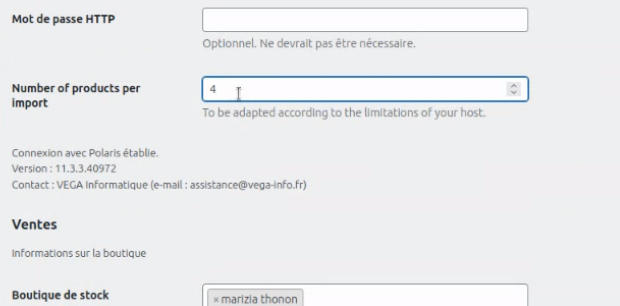
- Number of products per import (Number of products per import: allows you to choose the number of products to create in sequences
- HTTP password : Optional
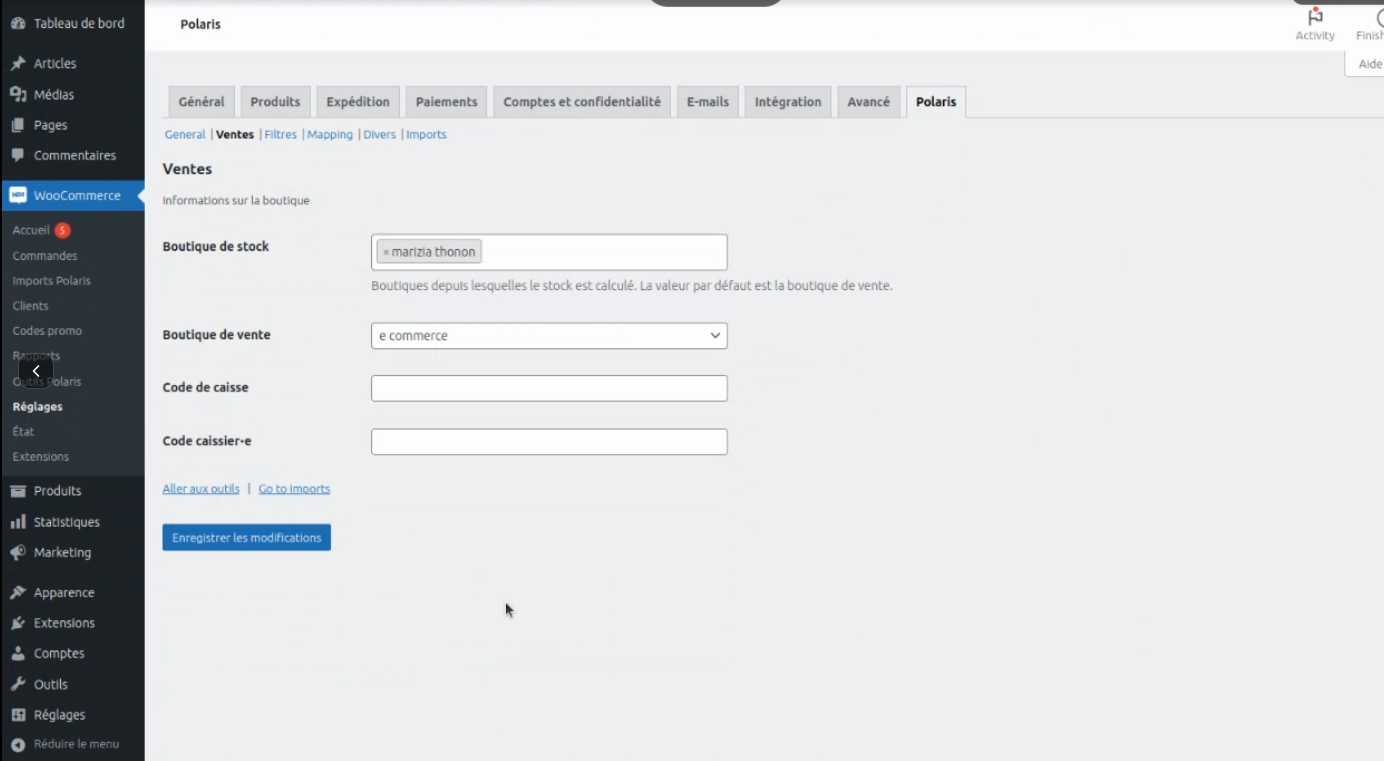
Store settings
In order to enable identification with Polaris, some information must be entered:
- Stock shop : There are several stores to choose from; you can select the one that interests you.
- Selling store : Select the store where sales are made in this field.
- Store code This field must be configured according to your physical store code in Polaris.
- Cash register code and Cashier code : Each must contain a numeric number that will allow web orders to be identified in the Polaris application.
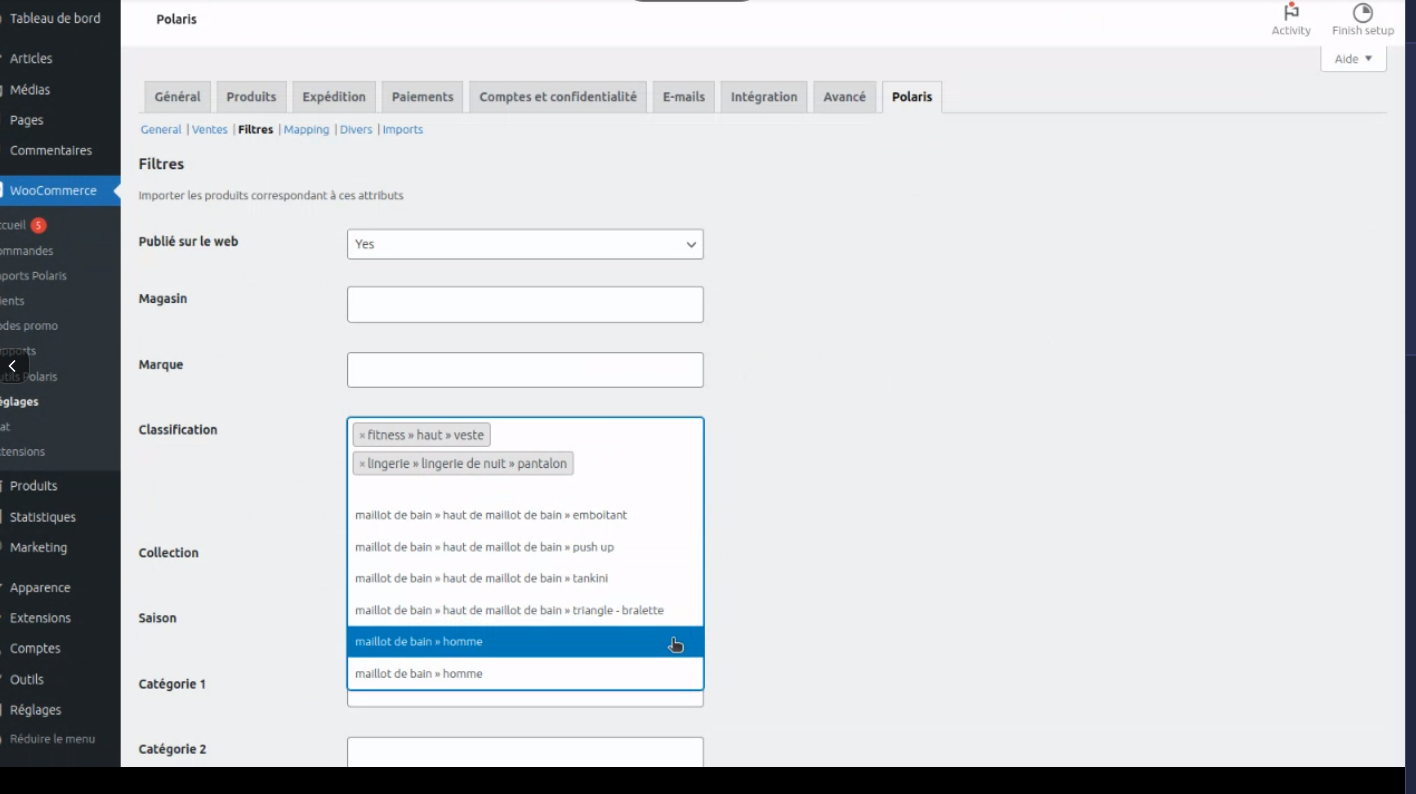
Data filtering
When importing data or synchronizing, you can choose which products to include. For each filter, you can choose one or more values.
- You can view your imports using the filter preview
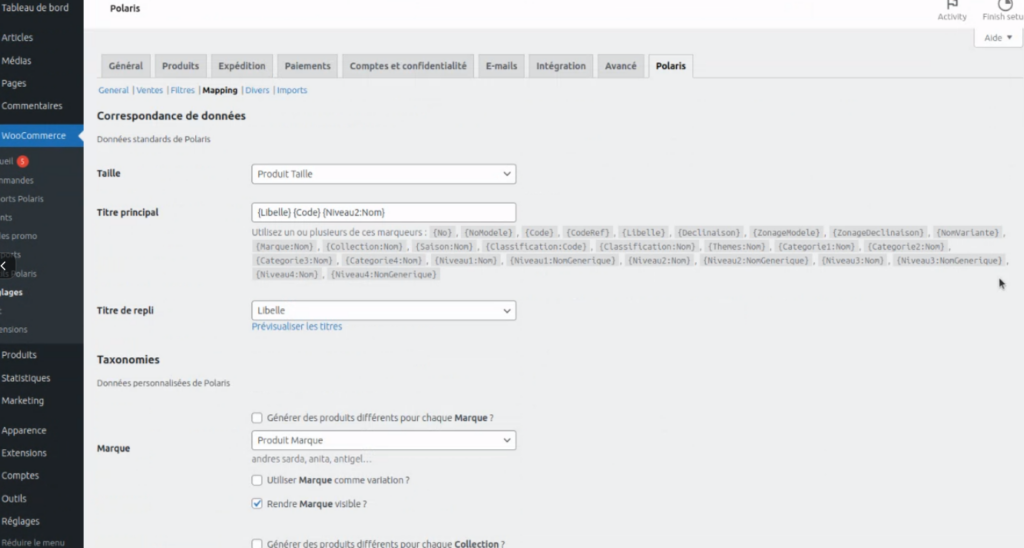
Data correspondence
You can choose the taxonomy correspondence during import or synchronization.
Debugging and logging
As with the rest of WordPress, logs are generated if the constant WP_DEBUG_LOG is activated in wp-config.php.
define('WP_DEBUG', true);
define('WP_DEBUG_LOG', true);
The default log file is wp-content/debug.log.
Import and synchronization
Go to the WooCommerce Admin Tools menu, then to the submenu Polaris Imports.
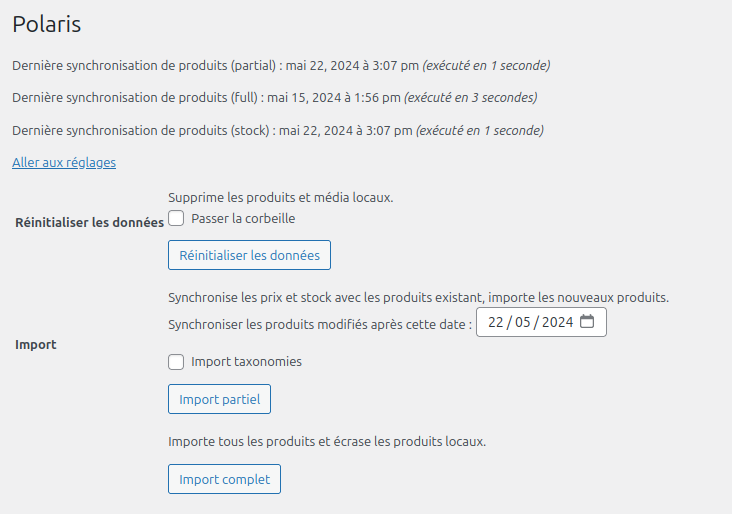
Data reset
When setting up the store or for testing purposes, you may need to import and delete data.
The button Reset allows you to delete products, images, and taxonomies that were previously imported from Polaris.
Manual import and synchronization
The Polaris connector for WooCommerce will import products regularly.

Manual partial import allows you to update products in WooCommerce via the Polaris API.
To perform this import, click on the button corresponding to partial import.
What this import does:
- Import all taxonomy terms (if checked)
- Import new products
- Update prices and inventory for existing products
What this import does not do:
- Update other existing product data: title, description, taxonomies
- Import new images for existing products
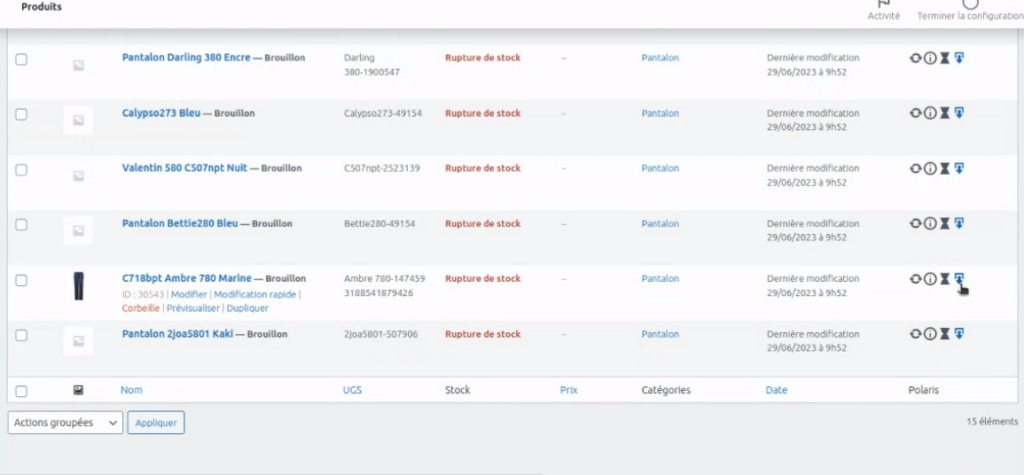
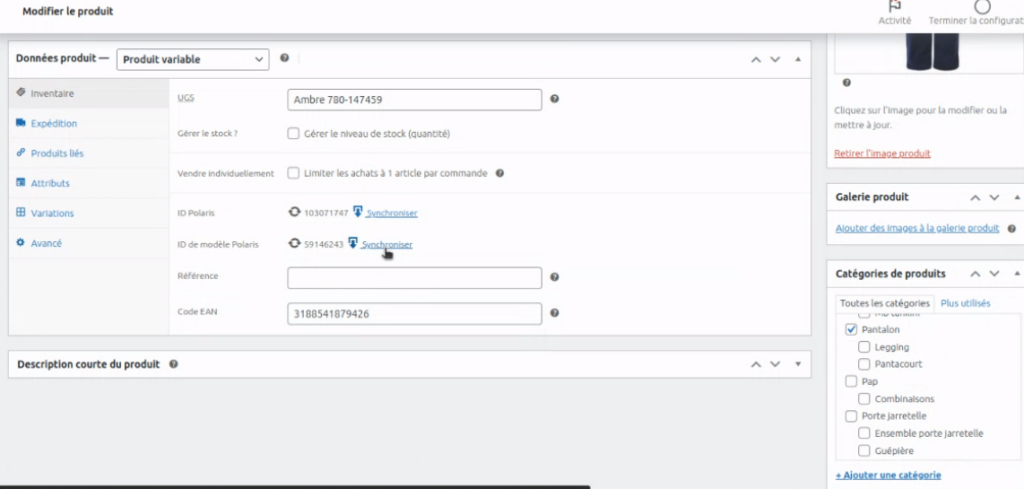
You can manually synchronize products at any time from the list of existing products in WooCommerce.
To do this, simply press the synchronization button for the desired product from the list of existing products, or from the product page.
Complete import
The complete manual import will delete all products in WooCommerce. Following this deletion, it will re-download all products in Polaris.
What this import does:
- Import all taxonomy terms (if checked)
- Import new products
- Updates existing products by overwriting data from Polaris
Import logs
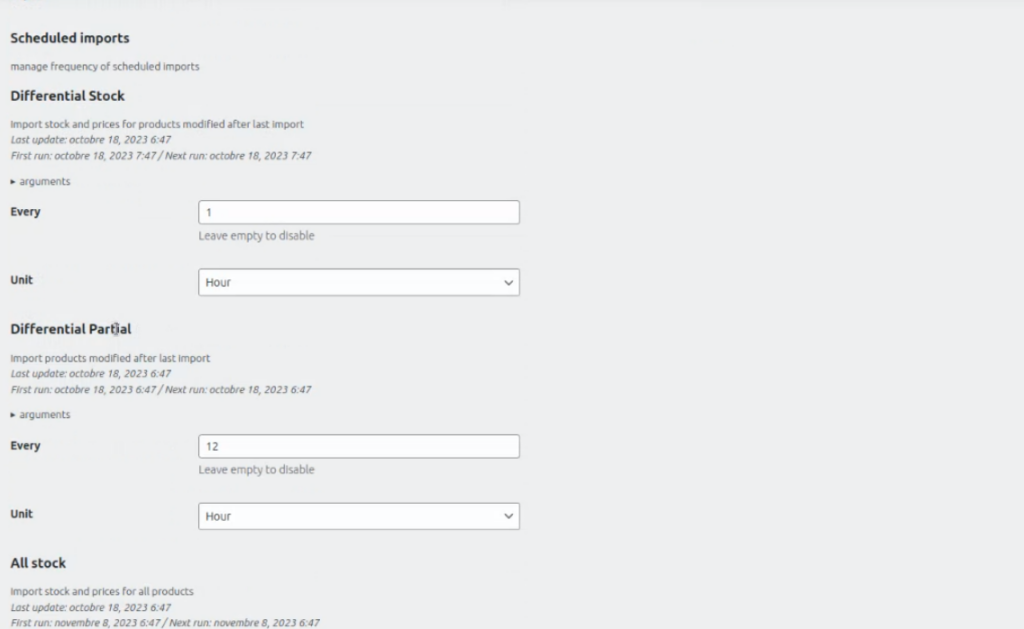
New products are imported twice a day, every 12 hours.
Prices and stock levels for existing products are updated every hour.
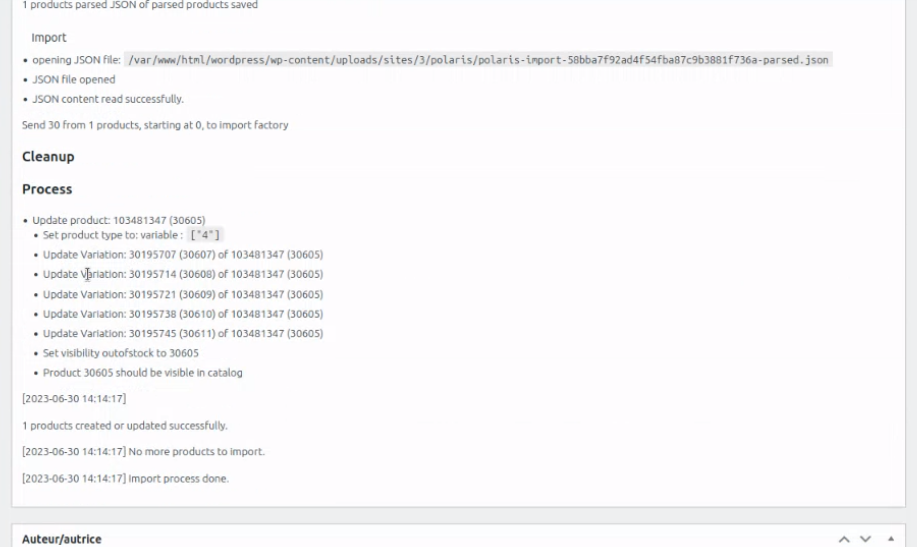
In Polaris imports, you have access to a list of all imports that you have successfully completed, those that are in progress, and those that have failed.
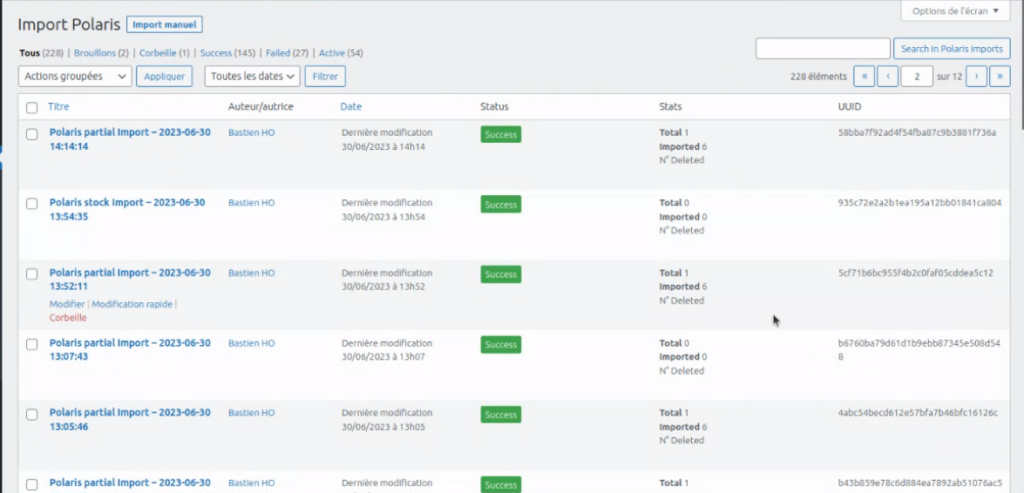
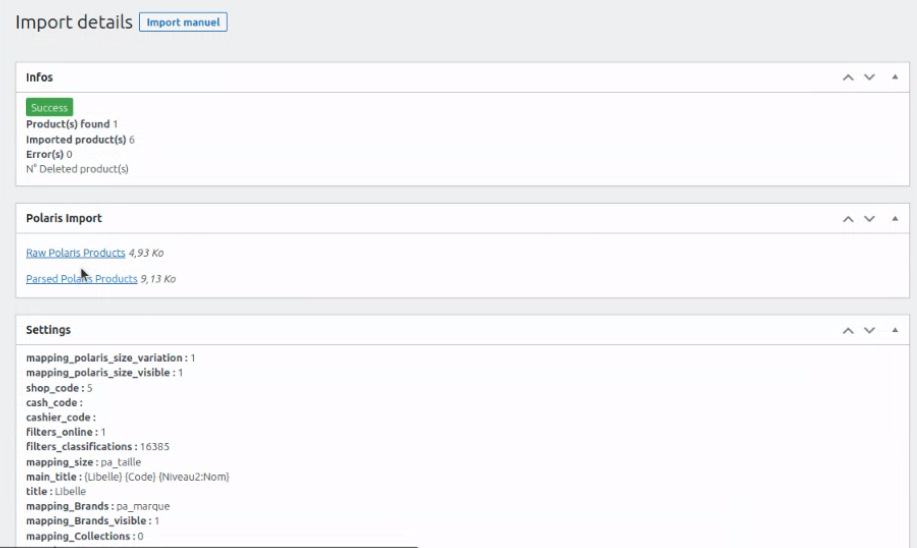
To find out more about each import in the list, click on the desired import. You will be able to access details about your imports, such as the number of products imported, or download documents related to your imports.
wp-cli utility
The complete import may not be successful if you attempt to import a database that is too large and your web server is configured with atoo short a deadline.
To perform this delicious action, we have created commands for wp-cli.
The list of available commands can be accessed with the command wp polaris.
All orders must be executed “as” a WordPress account in order to assign an author to the products.
Available commands:
reset
wp polaris reset --user=admin
Resets all data. Identical to the dashboard version.
import-products
wp polaris import-products --user=admin
This command accepts several parameters:
mode
Import mode. --mode=partial for partial import or --mode=full for the complete import.
Default value: partial
only_recent
Will only import products created after the last import. --only_recent=true .
Default value: false
limit
Number of products to import. The value 0 will import all products. This option is especially useful for importing via partial import in several batches. --limit=10 will limit imports to 10 products.
Default value: 0
no_modeles
Number of Polaris models to import, separated by commas. To import specific products. --no_modeles=105,589 will import forms 105 and 589.
Default value: null
polaris-debug
Displays debugging information. --polaris-debug=true will display information during the import process.
Default value: false
Would you like more information about the features of the plugin ?
View product sheet
Woocommerce connector – Polaris
Easily connect your WooCommerce to your Polaris point of sale software.