Do you have a WooCommerce online store and want to export your completed orders to your accounting software? Here's how to do it!
Prerequisite: Install the “Accounting for WooCommerce” extension.
Download and install “Accounting for WooCommerce,” either the Freemium or Professional (paid) version.
1. Set up your accounting codes on WooCommerce
General settings for your chart of accounts in WooCommerce
If you are using the free version of " Accounting for Woocommerce"You can only define generic codes.
- In the WordPress admin interface, go to “WooCommerce > Settings,” then to the “Accounting” tab.
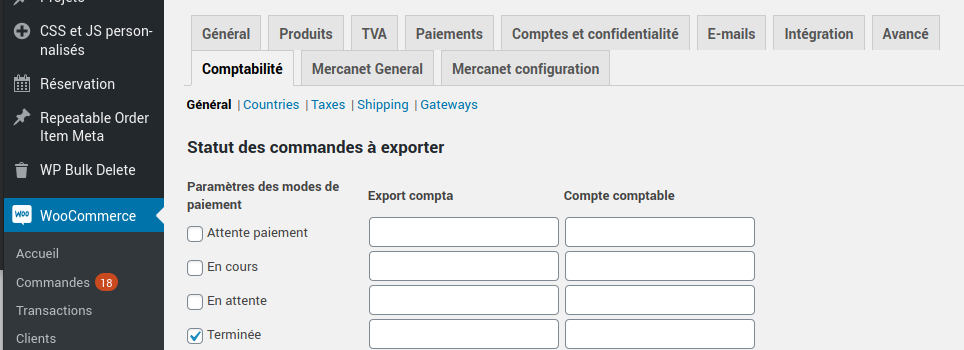
You can then define your accounting codes for each type of accounting information: products, taxes, shipping costs, payment methods, accounting ledger, cost accounting, based on payment methods, order status, etc.

- Export order status: for each order status, you can define a different accounting account (Awaiting payment, In progress, Pending, Completed, Cancelled, Refunded, Failed).
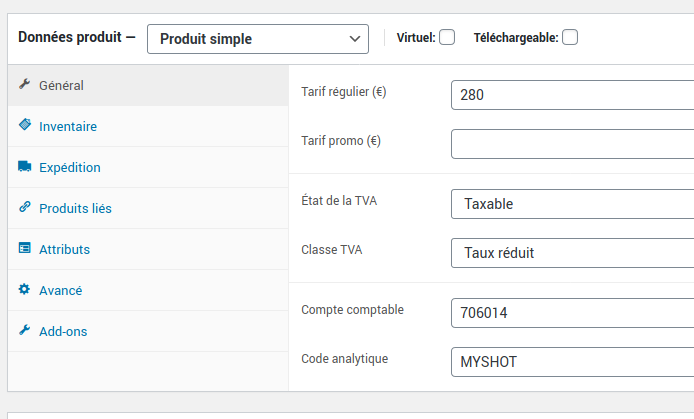
- For Products, define a default Accounting Account and Analytical Code.
- For Customers, set a default Accounting Account.
- For taxes and shipping methods, set a default accounting account and an analytical code for shipments.
- For your Promotions, define an Accounting Account and an Analytical Code.
- For your Sales Journal Code.
- For Exceptional credits and expenses, define a General ledger account.
There are 5 tabs available, allowing you to edit the specific accounting codes for the different settings you have defined in WooCommerce:
- Countries
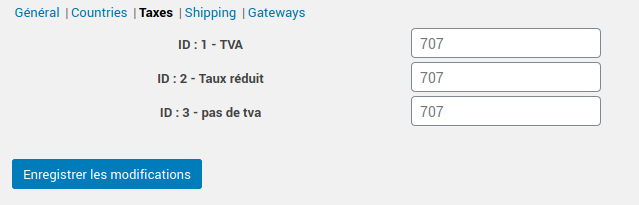
- Taxes (TVA types)
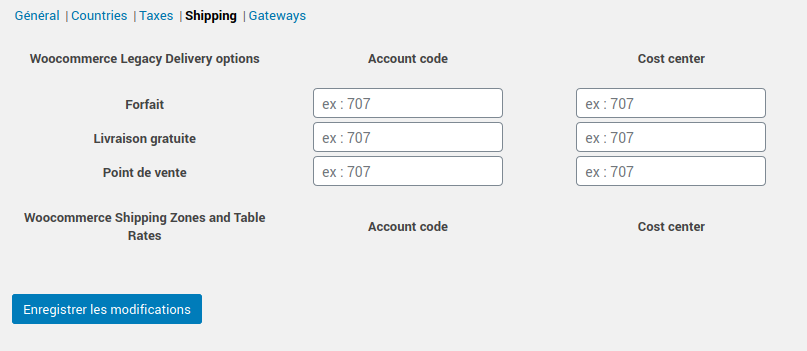
- Shipping costs
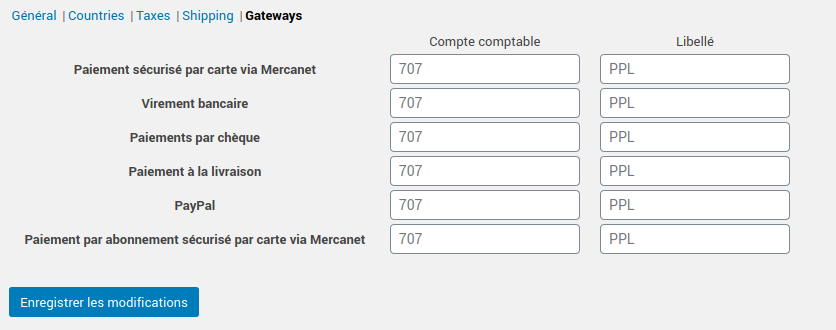
- Payment methods
In the Pro version
First, define general accounting codes, as explained above.
Then, for each of your products, you can enter a accounting code and an analytic code.
Your detailed accounting
Integrate your detailed chart of accounts.
Define detailed accounting codes for each product, taxes, shipping costs, payment methods, accounting ledger, analytical accounting codes.
We recommend using import software if you want to enter all values quickly—especially if you have a large product catalog. You can easily do this using import/export extensions for your data, such as WP All Import.
2. Configure the data to be exported to EBP accounting
Return to the settings for the “Accounting for WooCommerce” extension from the WordPress admin panel: “WooCommerce > Settings,” then go to the “Accounting” tab.
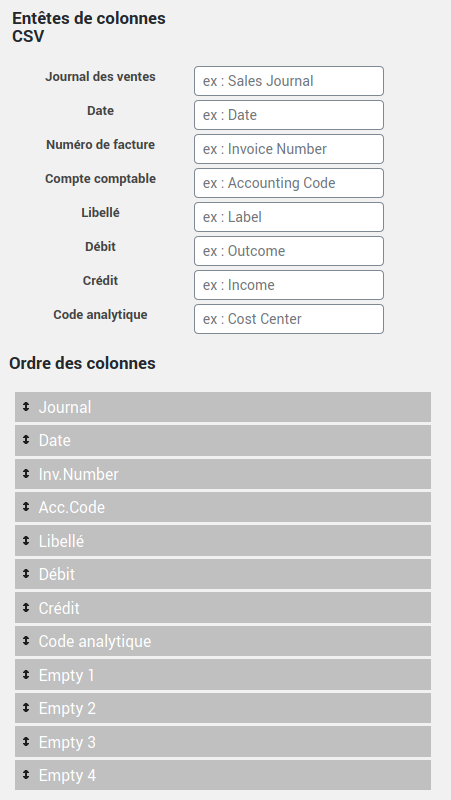
At the bottom of the general settings page, you can define column headers from your export file, as well as their order.
Export whatever you want to wherever you want!
3. Export your entries from WooCommerce
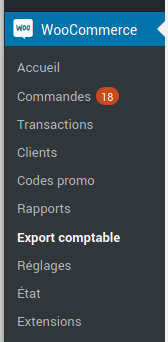
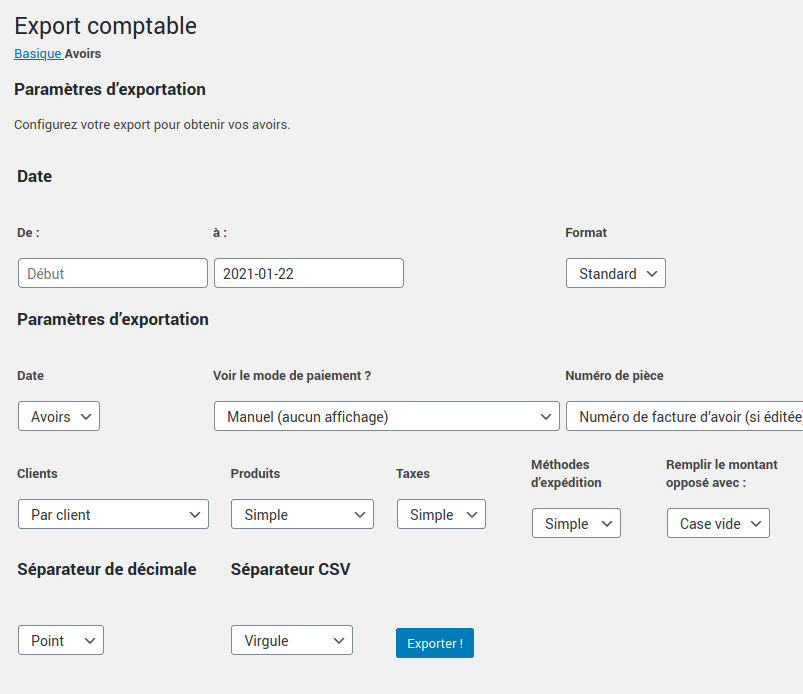
To export your orders to your accounting software (EBP, Ciel, or other), simply go to “WooCommerce > Accounting Export.”
You can then choose what you want to export:
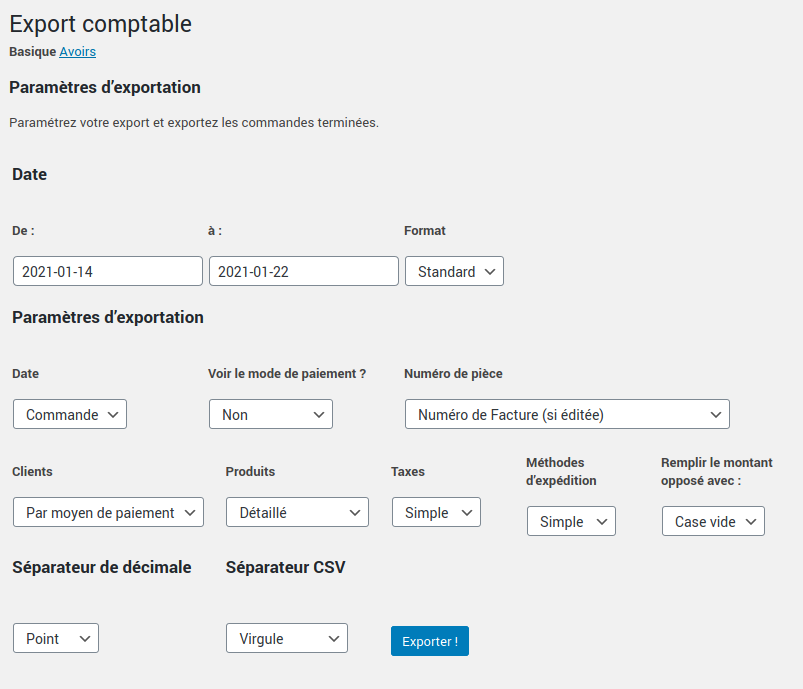
Here are all the export criteria you can configure:
- Start and end date of export, choosing the date format
- Date: of order, confirmation, payment, invoicing
- View payment method, or not
- Document number (invoice or order number)
- Customers (by customer or by payment method)
- Products (simple or detailed)
- Taxes (simple or detailed)
- Shipping methods (simple or detailed)
- Fill in the opposite amount with: empty box or “0” (depending on your import preferences in your accounting software)
- Decimal separator type (period or comma)
- CSV separator (comma, semicolon, or tab [used for TSV format])
Export your assets
You can also export your credit notes to your accounting software by clicking on the “Credit Notes” tab (at the top of the page).
4. Import your file into EBP Accounting
On EBP Accounting, you can then import your file.
To do this, simply follow this tutorial on the EBP.com website. If you are on a Mac, follow this tutorial.
Would you like more information about the features of the plugin ?
View product sheet
Accounting for WooCommerce – Pro Module 1.7.0
Everything you need to transfer your sales from Woocommerce to accounting software!